 INCISOR®
1 · Before you start
You need three things, and two of them you may already have.
A Mac or a Windows PC
Incisor® runs on macOS (Apple Silicon and Intel) and 64-bit Windows. Windows ARM is not supported yet.
A code editor
Any editor works. This tutorial uses Visual Studio Code, which is free and is the editor the debugging and TypeScript integrations are built for.
An Incisor® account
Free, created from inside the app in section 2. Incisor® Free includes nearly the whole feature set with daily usage limits. No card is needed.
A little JavaScript
You'll write about ten lines. If you can read a function, you can follow along. Nothing here needs Node, npm or a build step.
2 · Install and sign in
- Download Incisor® from the downloads page. The Mac build is a notarized disk image; the Windows build is an installer that needs no admin rights.
- Open it. On a Mac, drag Incisor® to Applications and launch it. On Windows, run the installer and launch it from the Start menu.
- The window that opens is the Control Center, with a login box in the middle. Press Sign Up.
- Fill in the form. Your email address is your username. Passwords need 8 to 32 characters with an uppercase letter, a lowercase letter, a number and a special character.
- Check your inbox and confirm the email. Then log in.
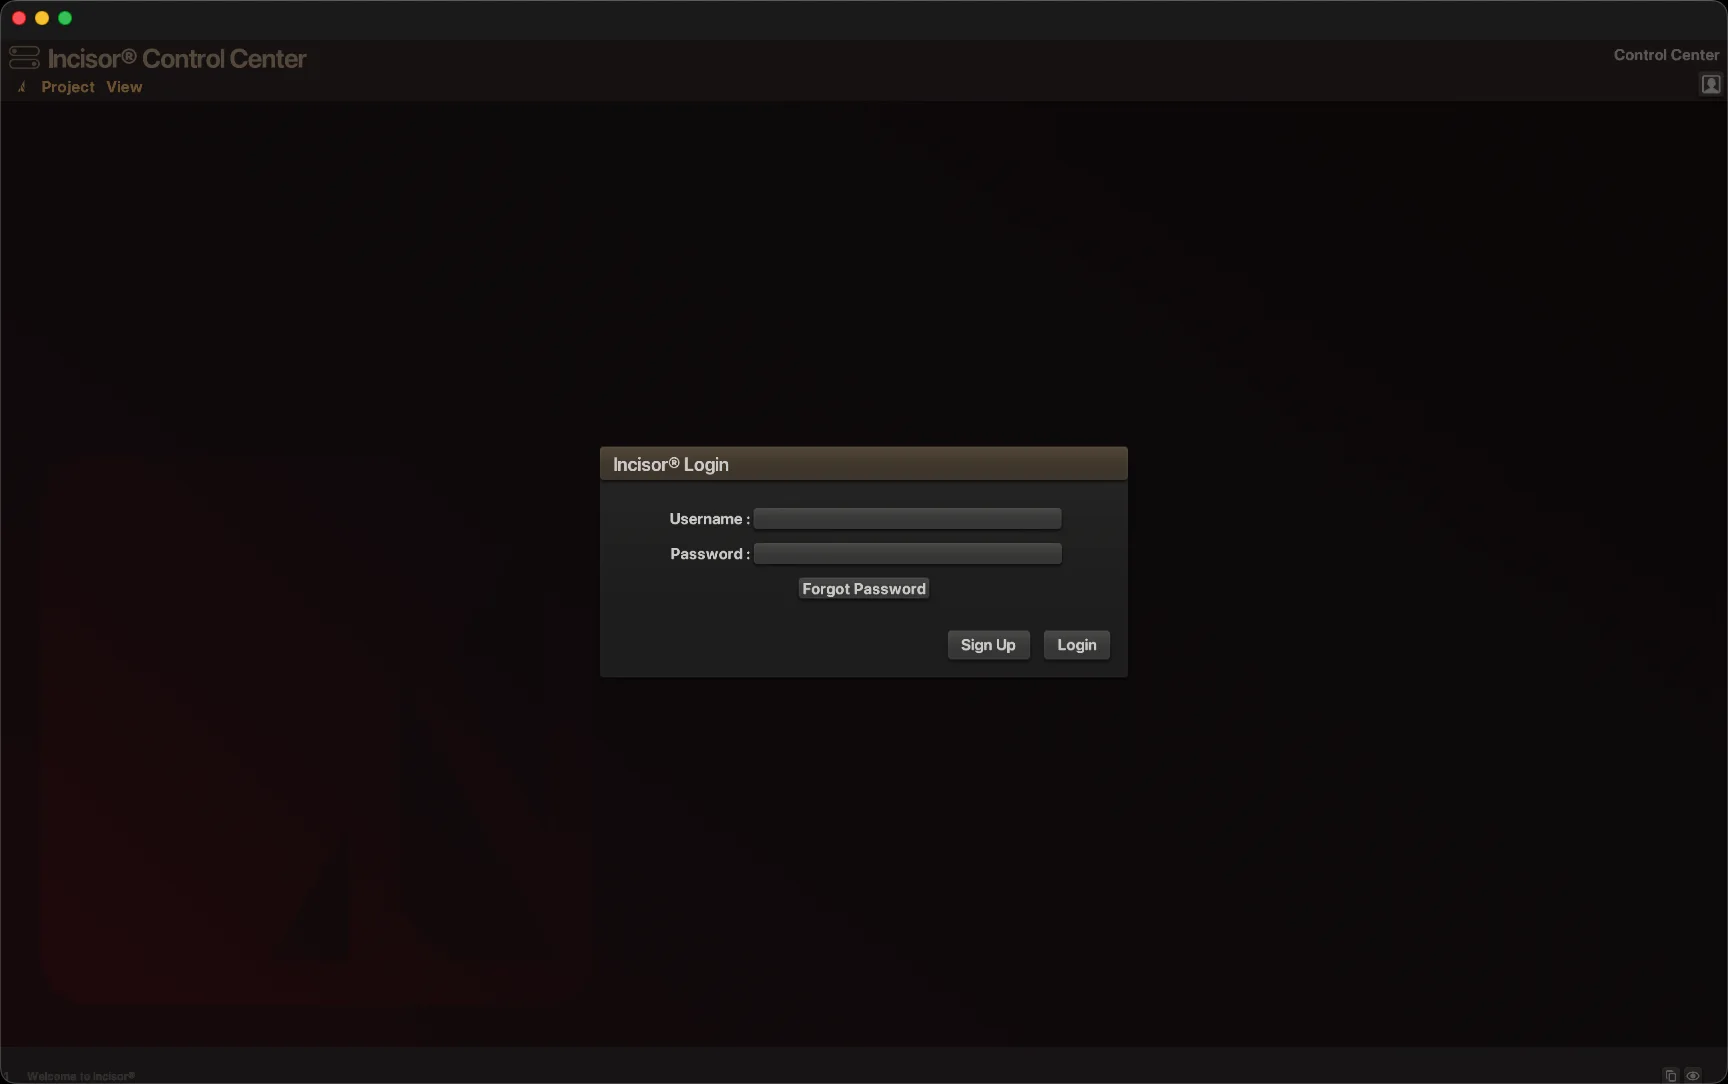
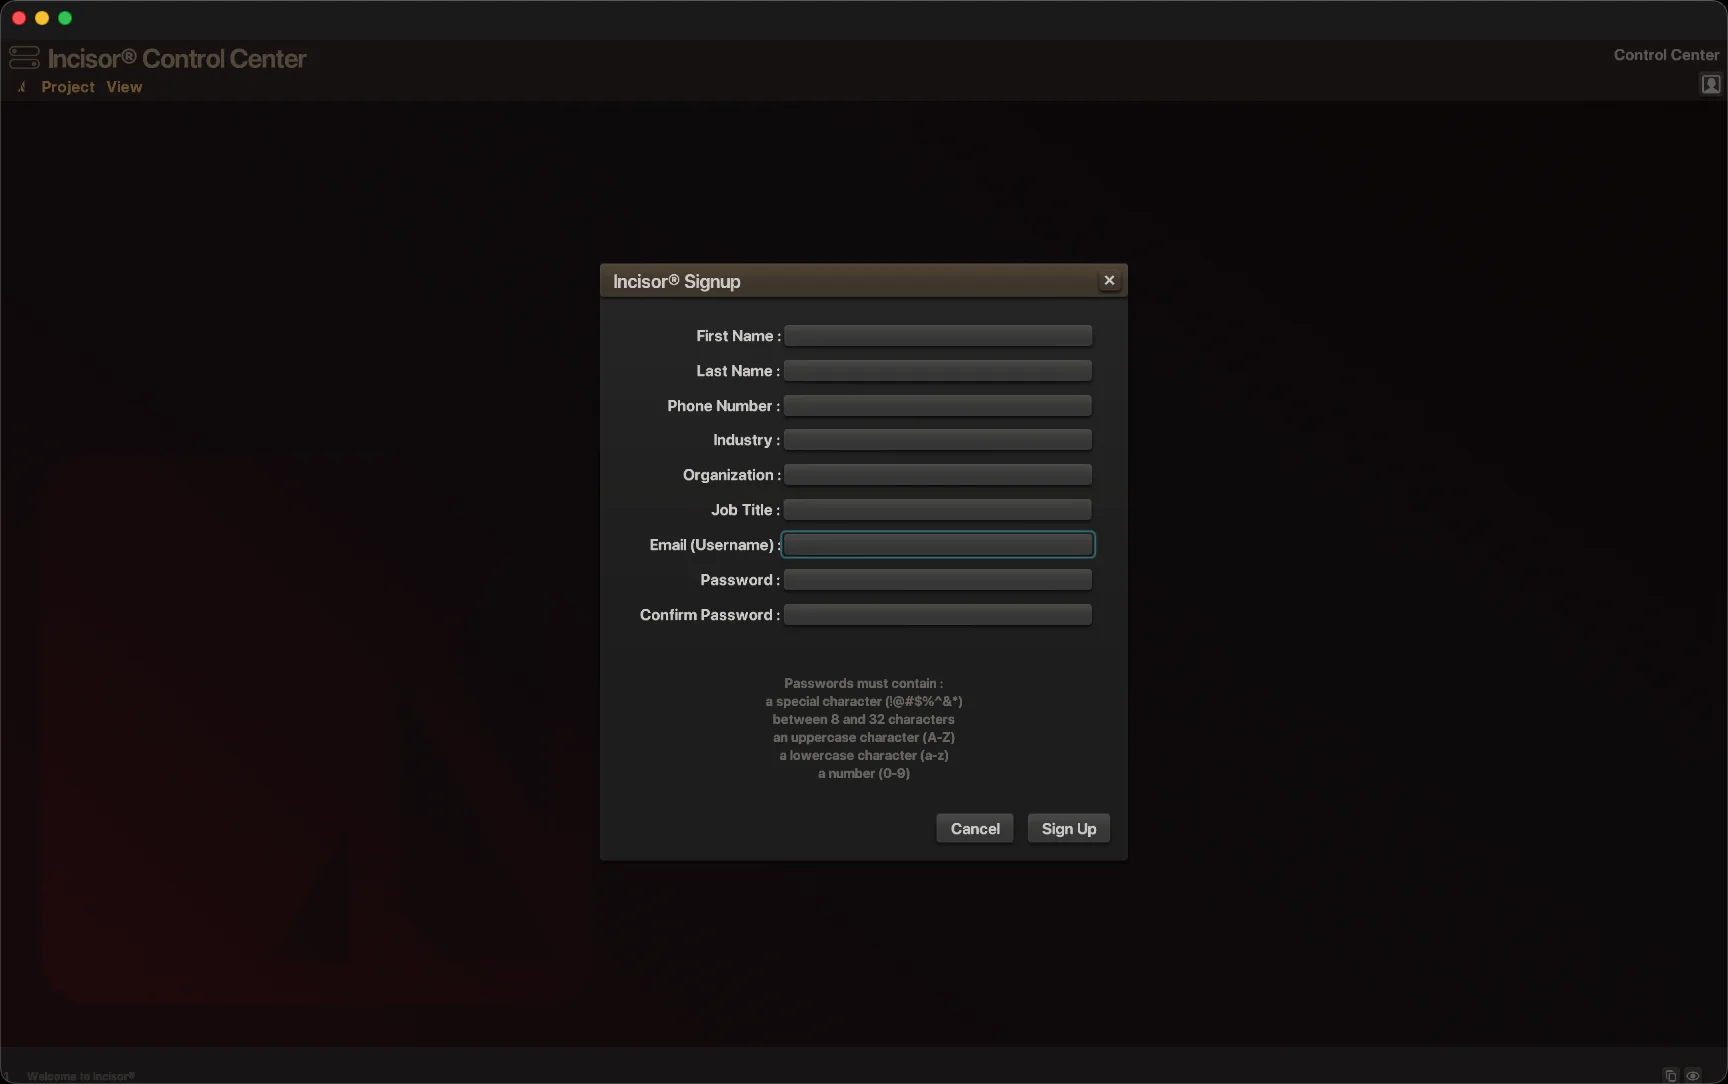
Already have an account from Incisor® Red? It works in Crimson as it is. Log in and carry on.
3 · The Control Center
Every Incisor® window starts on the Control Center. It is the tab furthest to the left, and it stays there while you work, one click away from any project. From here you can open the Project Gallery, start a New Project, Browse for a project folder on disk, or get back to a recent project.
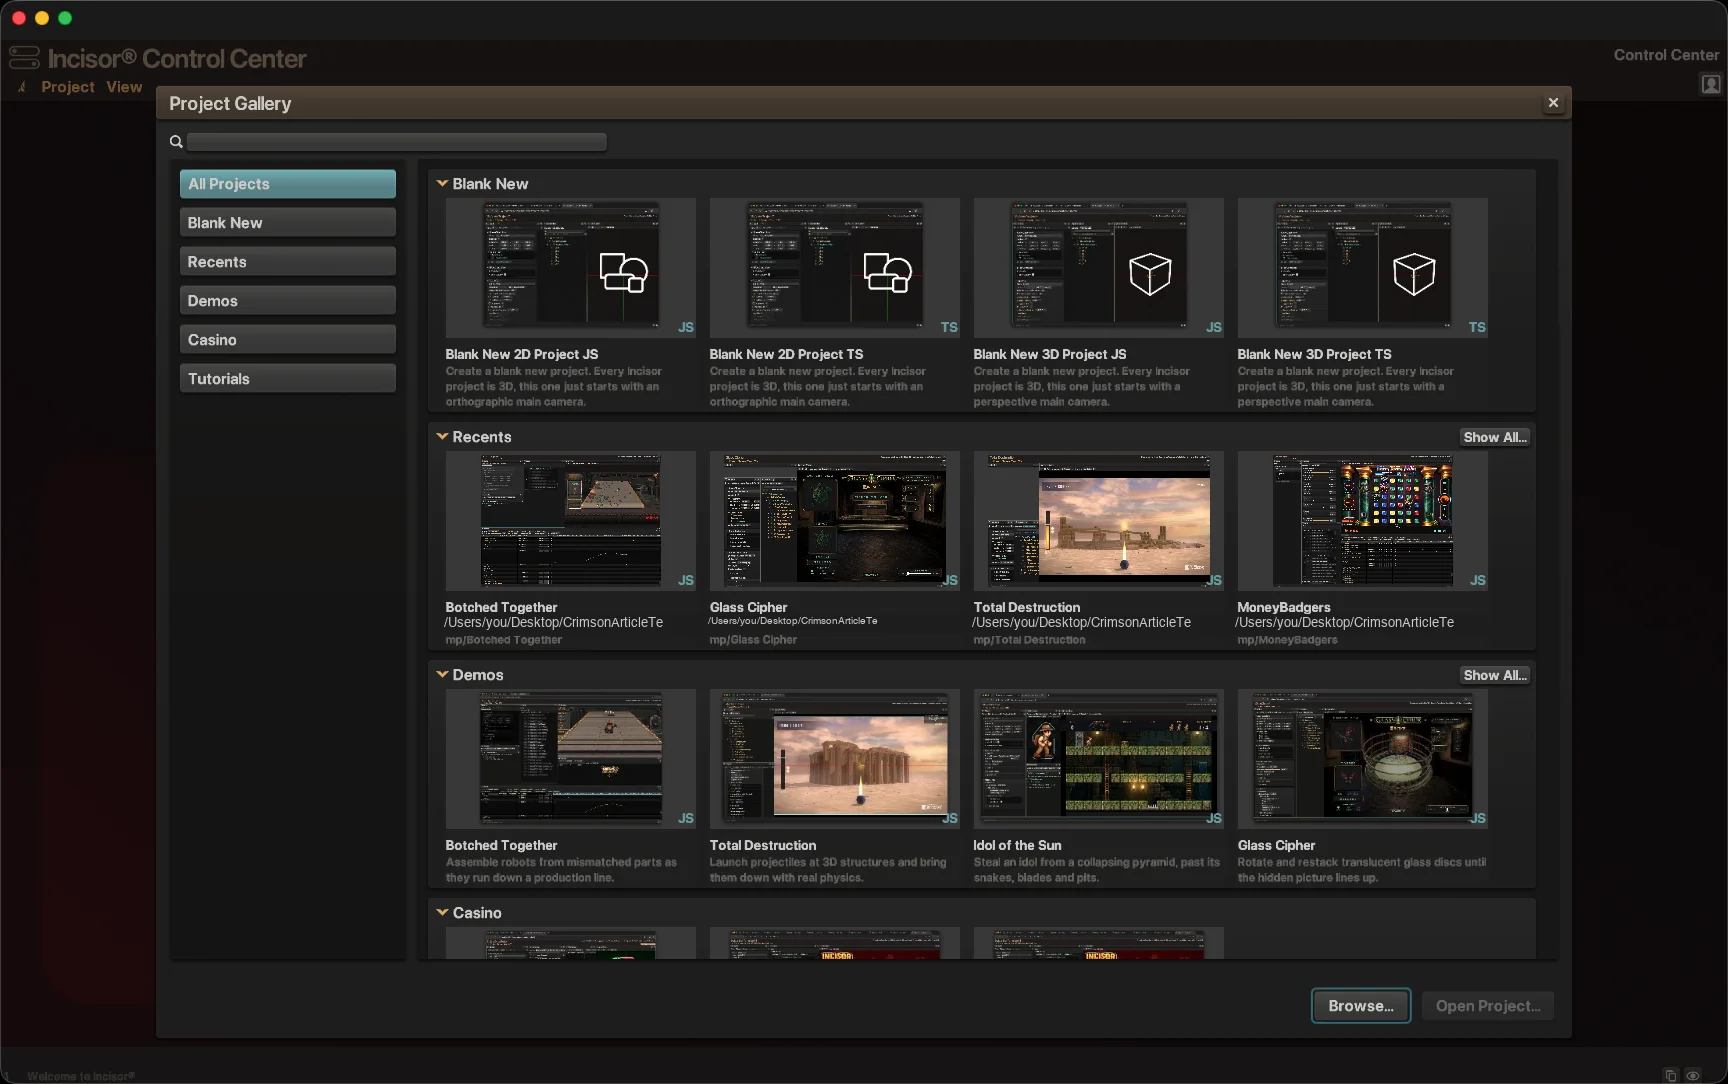
Two things to know about where projects live:
- Gallery projects open in a scratch folder. Opening an example or a blank project puts a copy in Incisor®'s Project Scratch directory, so there is nothing to answer before you can try it.
- The first save is a Save As. When you save a scratch project for the first time, Incisor® asks where to put your copy. After that it saves in place. Anything left in scratch is cleared out after about a week.
4 · Open something that already works
Before writing anything, open one of the games or game vignettes in the Gallery. It shows you what a project looks like when it is done, and every panel you meet in the next section will have real content in it.
- In the Control Center, open the Project Gallery and choose Demos.
- Double-click Total Destruction. A new tab opens next to the Control Center and the project loads.
- Projects open paused. In the Live View panel, press the big Run button in the middle (or the small one in the panel's toolbar).
- Play. Aim with the mouse, hold to charge, release to launch. Knock the structure down.
- Press the square Stop button in the Live View toolbar when you're done. The project stops; the tab and the editor stay.
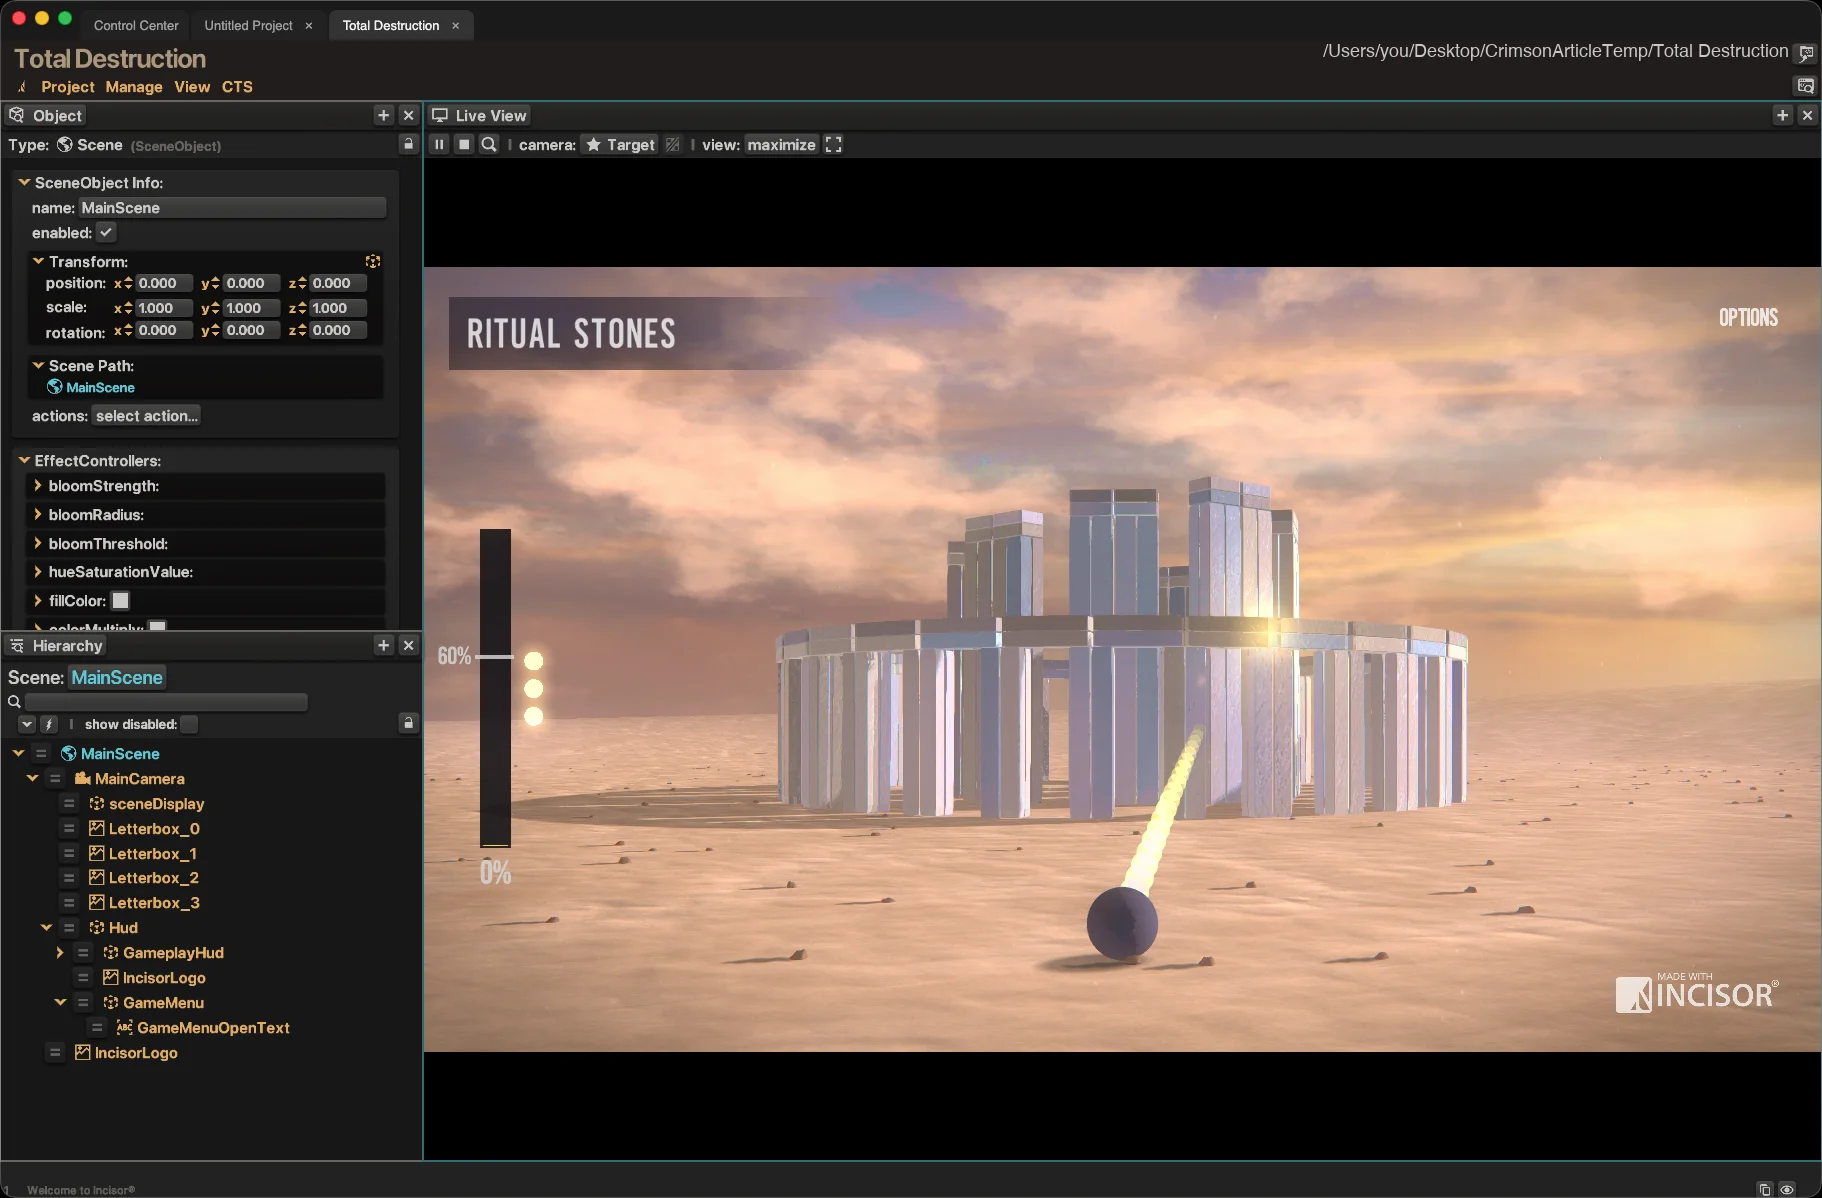
Everything you just played is an ordinary project folder: code in ProjectCode, images and sounds in Assets. You can read any of it, and the demos are written to be read.
5 · A lap around the editor
The editor (Incisor® calls it the inspector) is a set of panels around a running project. Each panel has a type, chosen from the small menu at the left of its header, and you can add panels with the + in a header, close them with ×, and drag the dividers. Arrange them however you like; a new project opens with the three on the left below.
| Panel | What it's for |
|---|---|
| Live View | The project itself, running. Run, Stop and zoom live in its toolbar. Click an object here to select it. |
| Hierarchy | Every object in the scene as a tree. Click a row to select it, drag it by its handle to reparent, search by name. |
| Object | Everything about the selected object: name, position, scale, rotation, the graphic it shows, its material, its effects. Edit a value and the running project changes. |
| Assets | Every file in the project's Assets folder, with a preview and the import settings for each one. |
| Construct | A visual editor for Constructs: groups of objects that artists and designers build, arrange and animate here, no code needed. Coders then drop a finished Construct into the game with one line. |
| Timeline | Keyframe animation for the open Construct. Position, scale, rotation, color, text, sound triggers, events and much more, with curves you can shape and a playhead you can scrub. |
| Log | The strip along the bottom of the window. Errors appear here in red and link to the line in your source. |
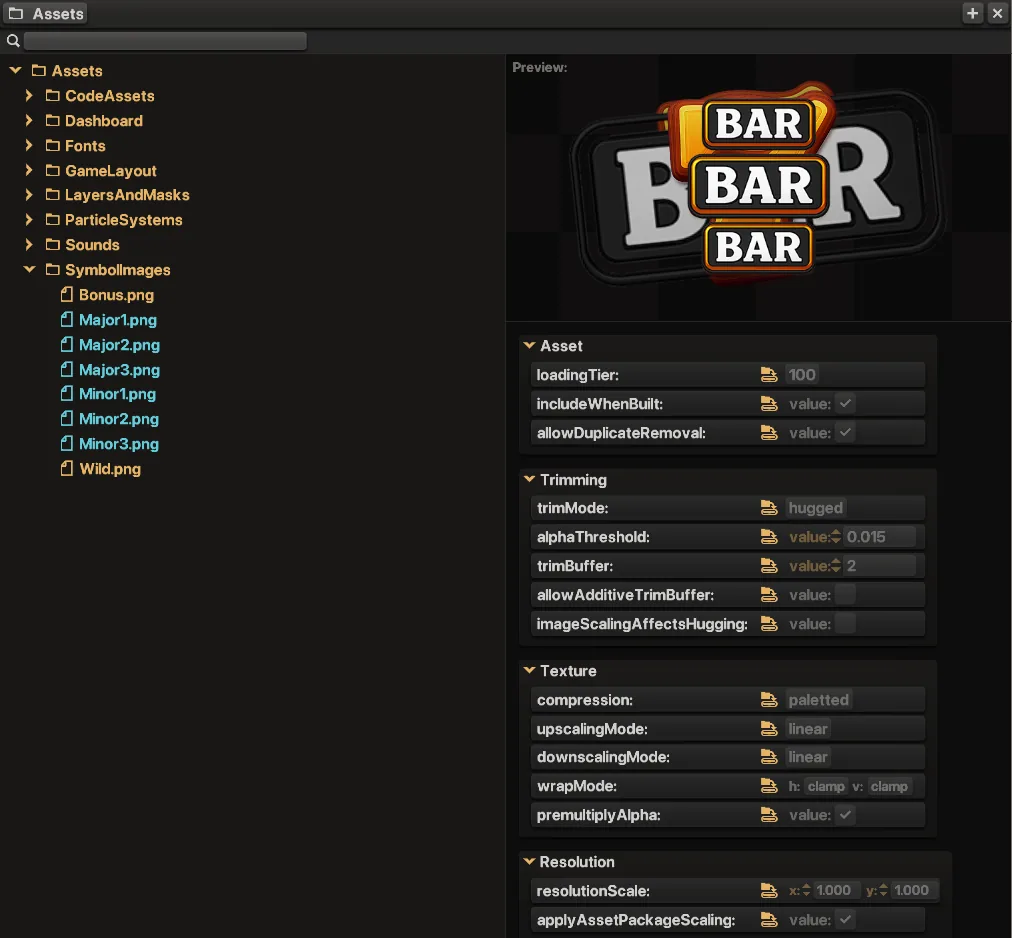
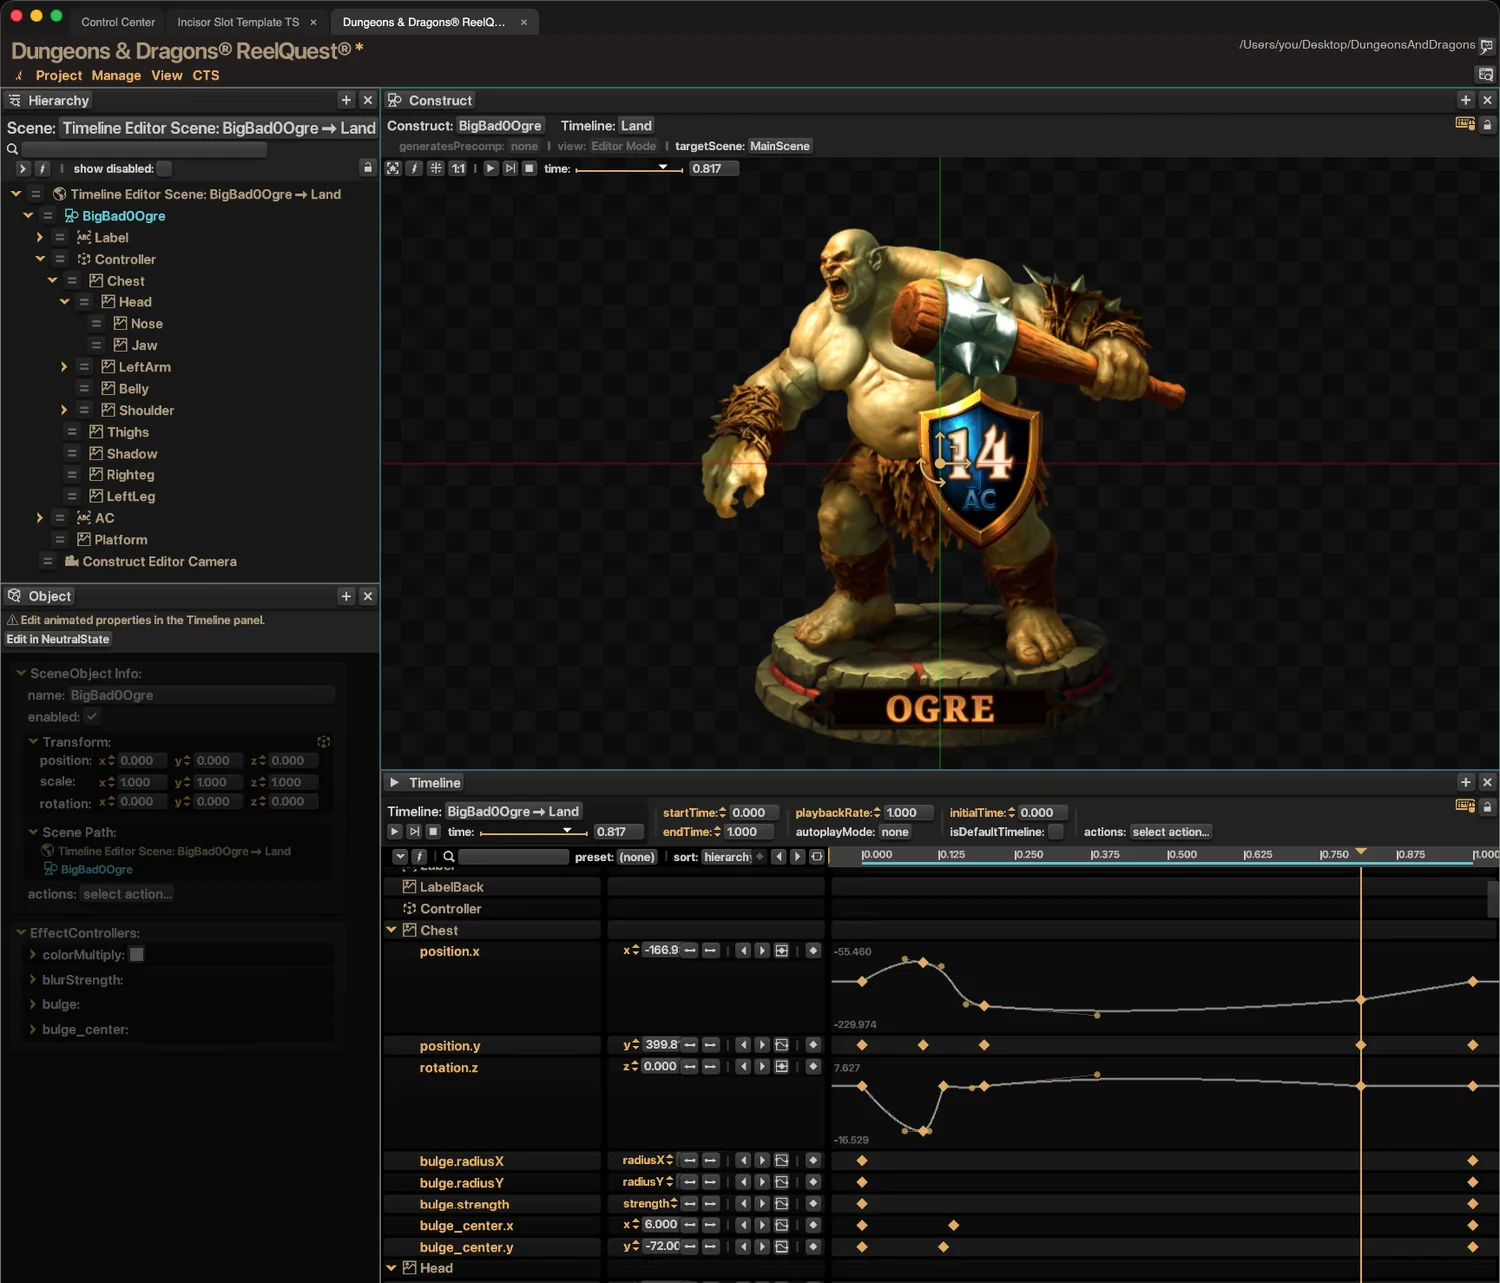
There are more panel types (Layers, Sounds, Data, Particle System, Flows, Loading Tier Testing and others) and you'll meet them as you need them. The seven above are enough for everything in this tutorial.
6 · Your first project
- Go back to the Control Center tab and open the Project Gallery.
- Under Blank New, double-click Blank New 2D Project JS. (Every Incisor® project is 3D underneath; the 2D option just starts with an orthographic camera.)
- A tab called Untitled Project opens. Press Run in the Live View. You should see the word Hello!
- Save it now (Project → Save, or Cmd+S / Ctrl+S). Because the project started in the scratch folder, this first save is a Save As: pick a folder and give the project a name. From here on it saves in place.
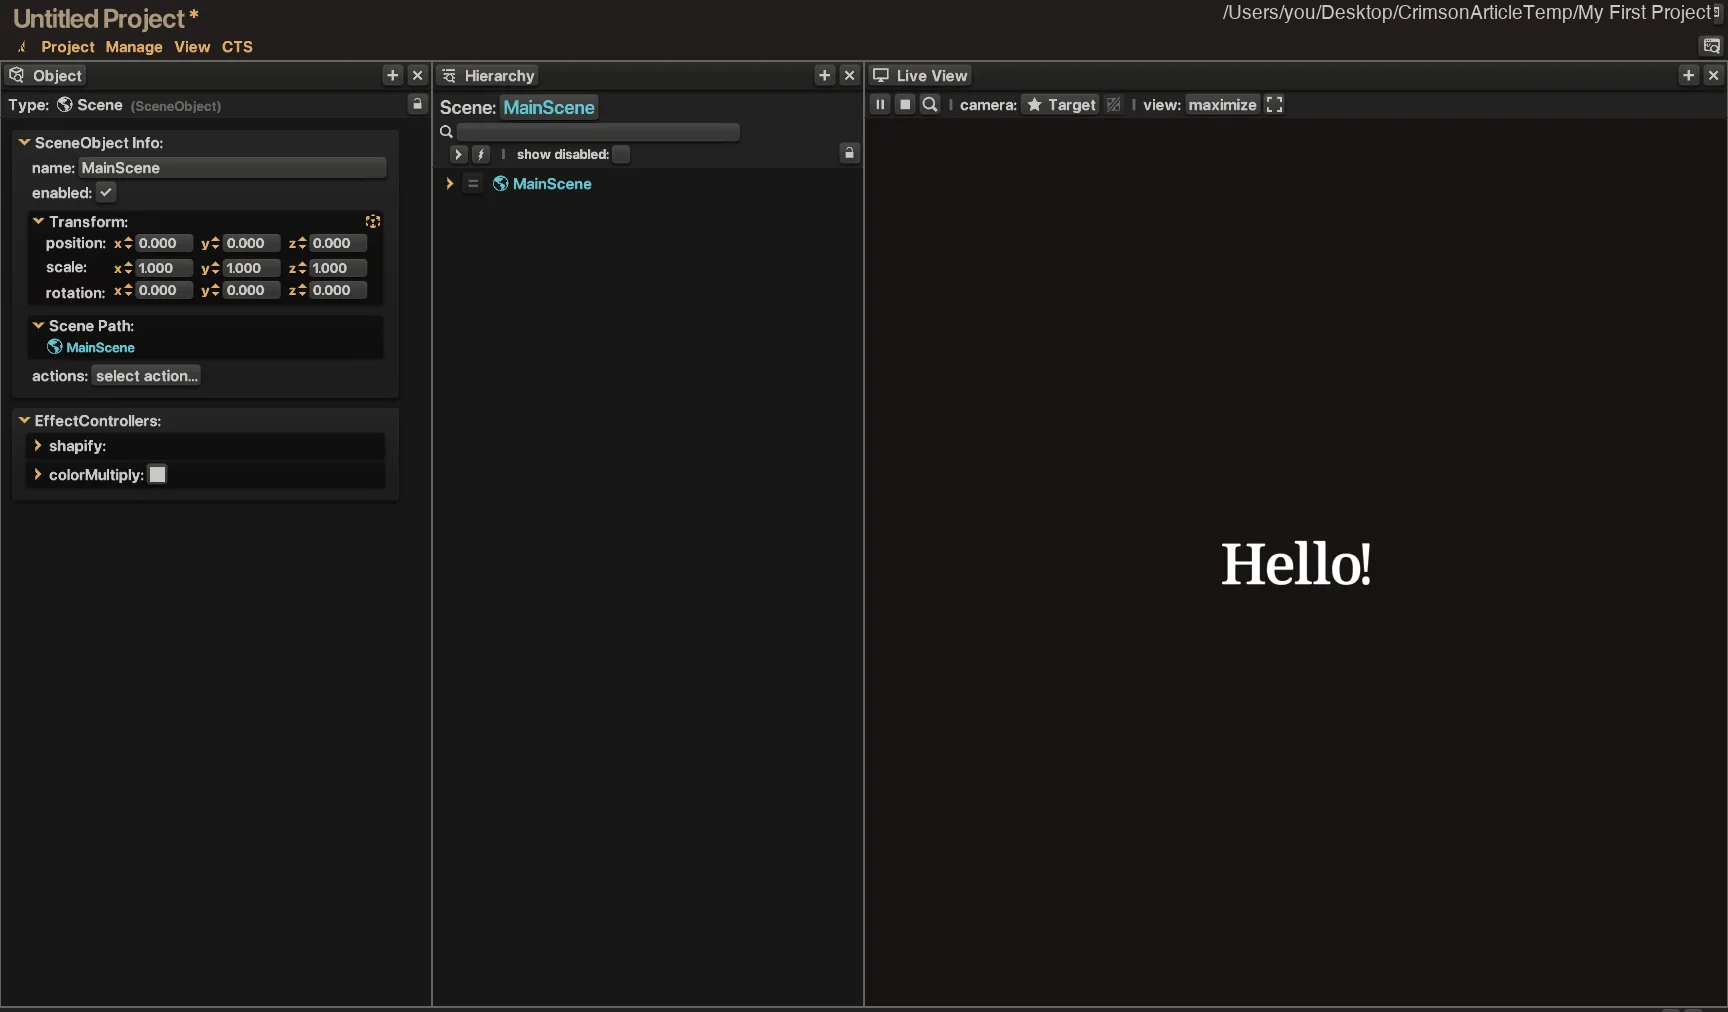
What's in the folder
The project path is shown at the top right of the window. Open that folder in your code editor (in VS Code, File → Open Folder…). This is all of it:
| Item | What it is |
|---|---|
ProjectCode/ | Your code. ProjectMain.js is the entry point: Incisor® calls its init() when the project starts. |
Assets/ | Images, fonts, sounds, models. Anything you drop in here becomes an asset. A new project comes with a SampleAssets folder to play with. |
Utilities/ | Files Incisor® maintains for you, including IncisorAPI.js, which gives your editor autocomplete for the whole API. |
ProjectSettings.json | Canvas size, publishing configurations, fonts, loading tiers. Edited from Project → Settings in the editor. |
jsconfig.json | Tells your editor which folders to index. |
// This is the main entry point for this Incisor® project.
// Throughout the project, this object can be referenced as 'pr'.
class ProjectMain
{
    init()
    {
        this.text = new TextAssembly();
        this.text.string = "Hello!";
    }
}
Two names you will see everywhere: nc is Incisor® itself (the engine, the scene, the assets, the API), and pr is this object, your project's main class, reachable from any file.
TypeScript. Pick Blank New 2D Project TS instead. Your code goes in TypescriptProjectCode/ProjectMain.ts, Incisor® compiles it into ProjectCode itself (no Node, no npm, no package.json) and recompiles whenever a file changes. A tsconfig.json and a .vscode folder are created for you, and type errors show up in the log and in VS Code's Problems panel.
7 · Change the code, see it live
Leave the project running. In your editor, replace the body of init() with this and save:
class ProjectMain
{
    init()
    {
        this.text = new TextAssembly();
        this.text.string = "Hello, Incisor!";
        this.text.position.y = 220;

        this.parrot = new GraphicObject(nc.graphicAssets.Parrot, nc.mainScene, "Parrot");
        this.parrot.position.y = -60;
        this.parrot.rotation.addMotion.z(-8, 8, 1);
    }
}
The moment you save, Incisor® notices the file change and reloads the project. The text moves up, and a parrot appears below it, rocking gently from side to side.
Line by line:
nc.graphicAssets.Parrotis theParrot.pngthat ships inAssets/SampleAssets. Every file in Assets becomes a property like this, and your editor autocompletes them. To use your own image, drop a PNG into the Assets folder and it appears undernc.graphicAssetswithin a second or two.new GraphicObject(asset, parent, name)puts a picture in the scene.nc.mainSceneis the root of everything you see.- Positions are in pixels of the project's canvas (1920 × 1080 for a new project), with the origin in the center and y pointing up.
rotation.addMotion.z(-8, 8, 1)adds a continuous pendulum motion between −8 and 8 degrees at speed 1. Every numeric property hasaddMotionfor continuous motion andswoopfor a one-time move with easing.
Try the autocomplete. Type this.parrot. and pause. Everything a GraphicObject can do is in that list, and the documentation for each entry is one hover away. Dotting your way around the API is the fastest way to learn it.
8 · Tweak it live in the editor
Now look at the same objects from the editor's side, and nudge them while the project runs.
- In the Hierarchy, open MainScene. You'll see MainCamera, TextAssembly and Parrot: the objects your code made.
- Click Parrot. The Object panel fills with it: its transform, the graphic asset it shows, its layer, its material.
- In Transform, set scale x and y to 1.5. The parrot grows in the Live View as you type. The rotation field keeps changing on its own, because the motion you added is still running.
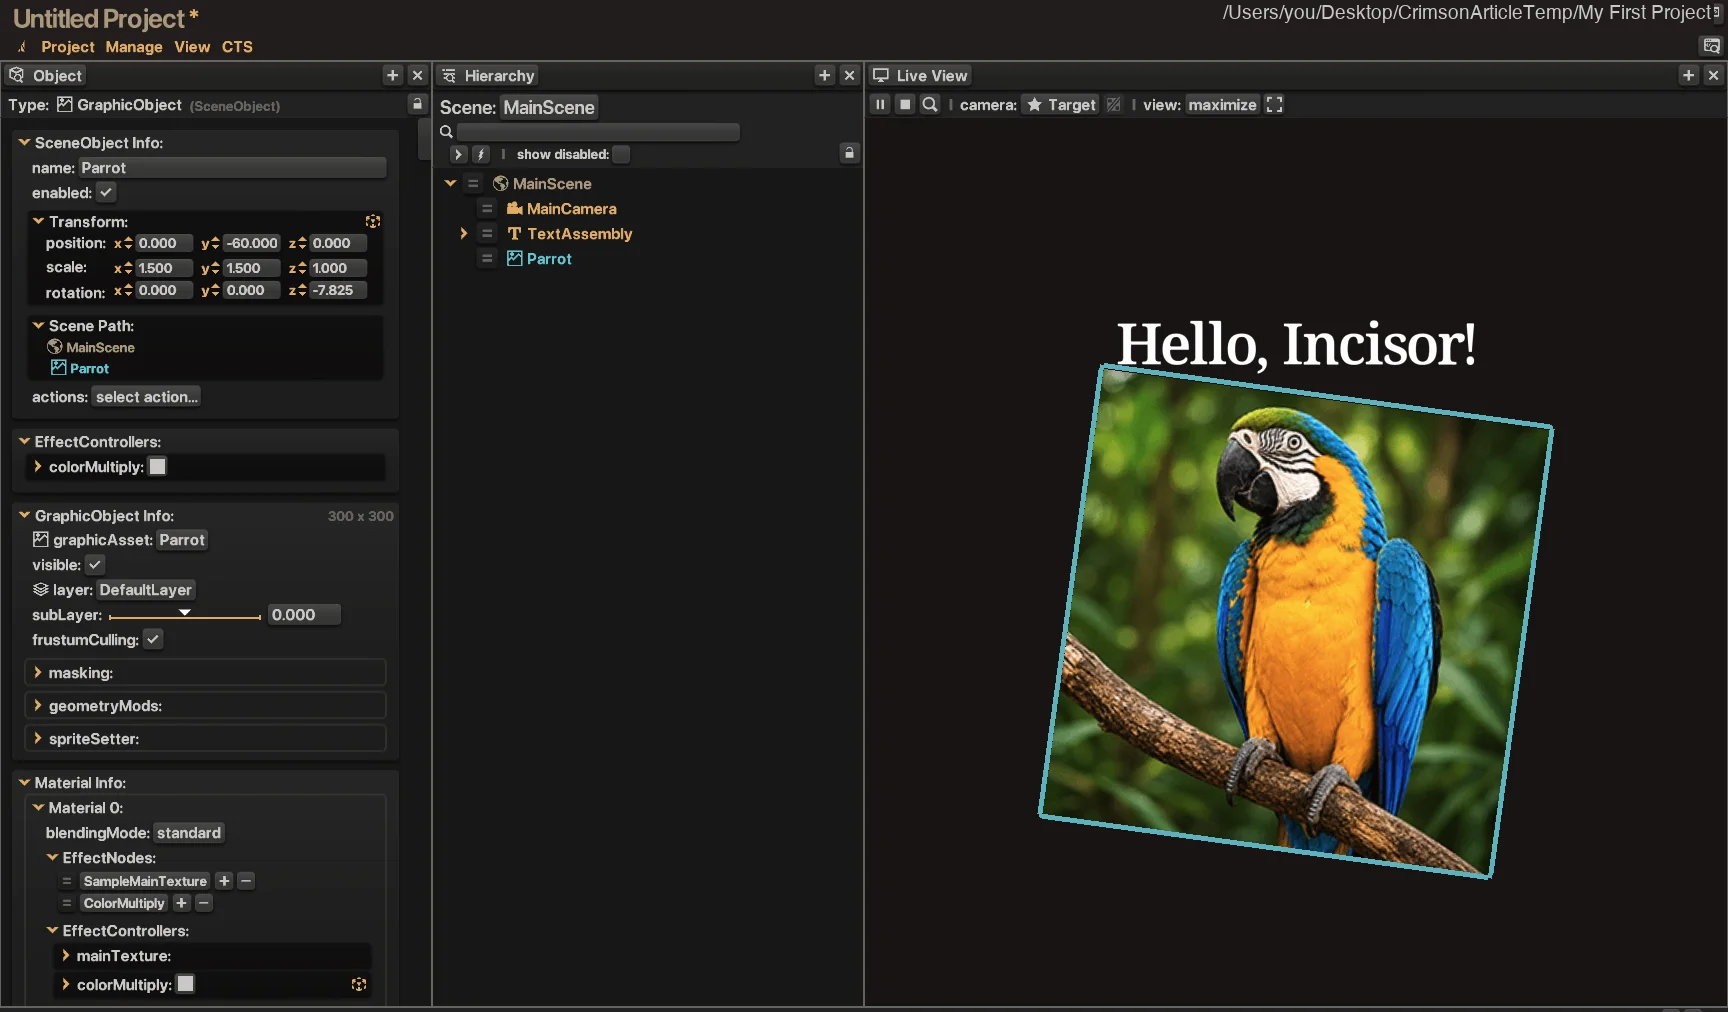
This is the idea the whole platform is built on. Code populates and drives objects; the GUI inspects and adjusts the same objects while the project runs; and the people who do each job can be different people.
Live View edits are temporary; Construct edits are saved. The Object panel edits whatever is selected. When that is an object in the running game, like the parrot here, the change applies to the running project only and is gone when it reloads, which makes it a quick way to find the right value before putting it in code. When the selected object belongs to a Construct open in the Construct panel (next section), the same edit is saved with the project.
9 · Animate without code
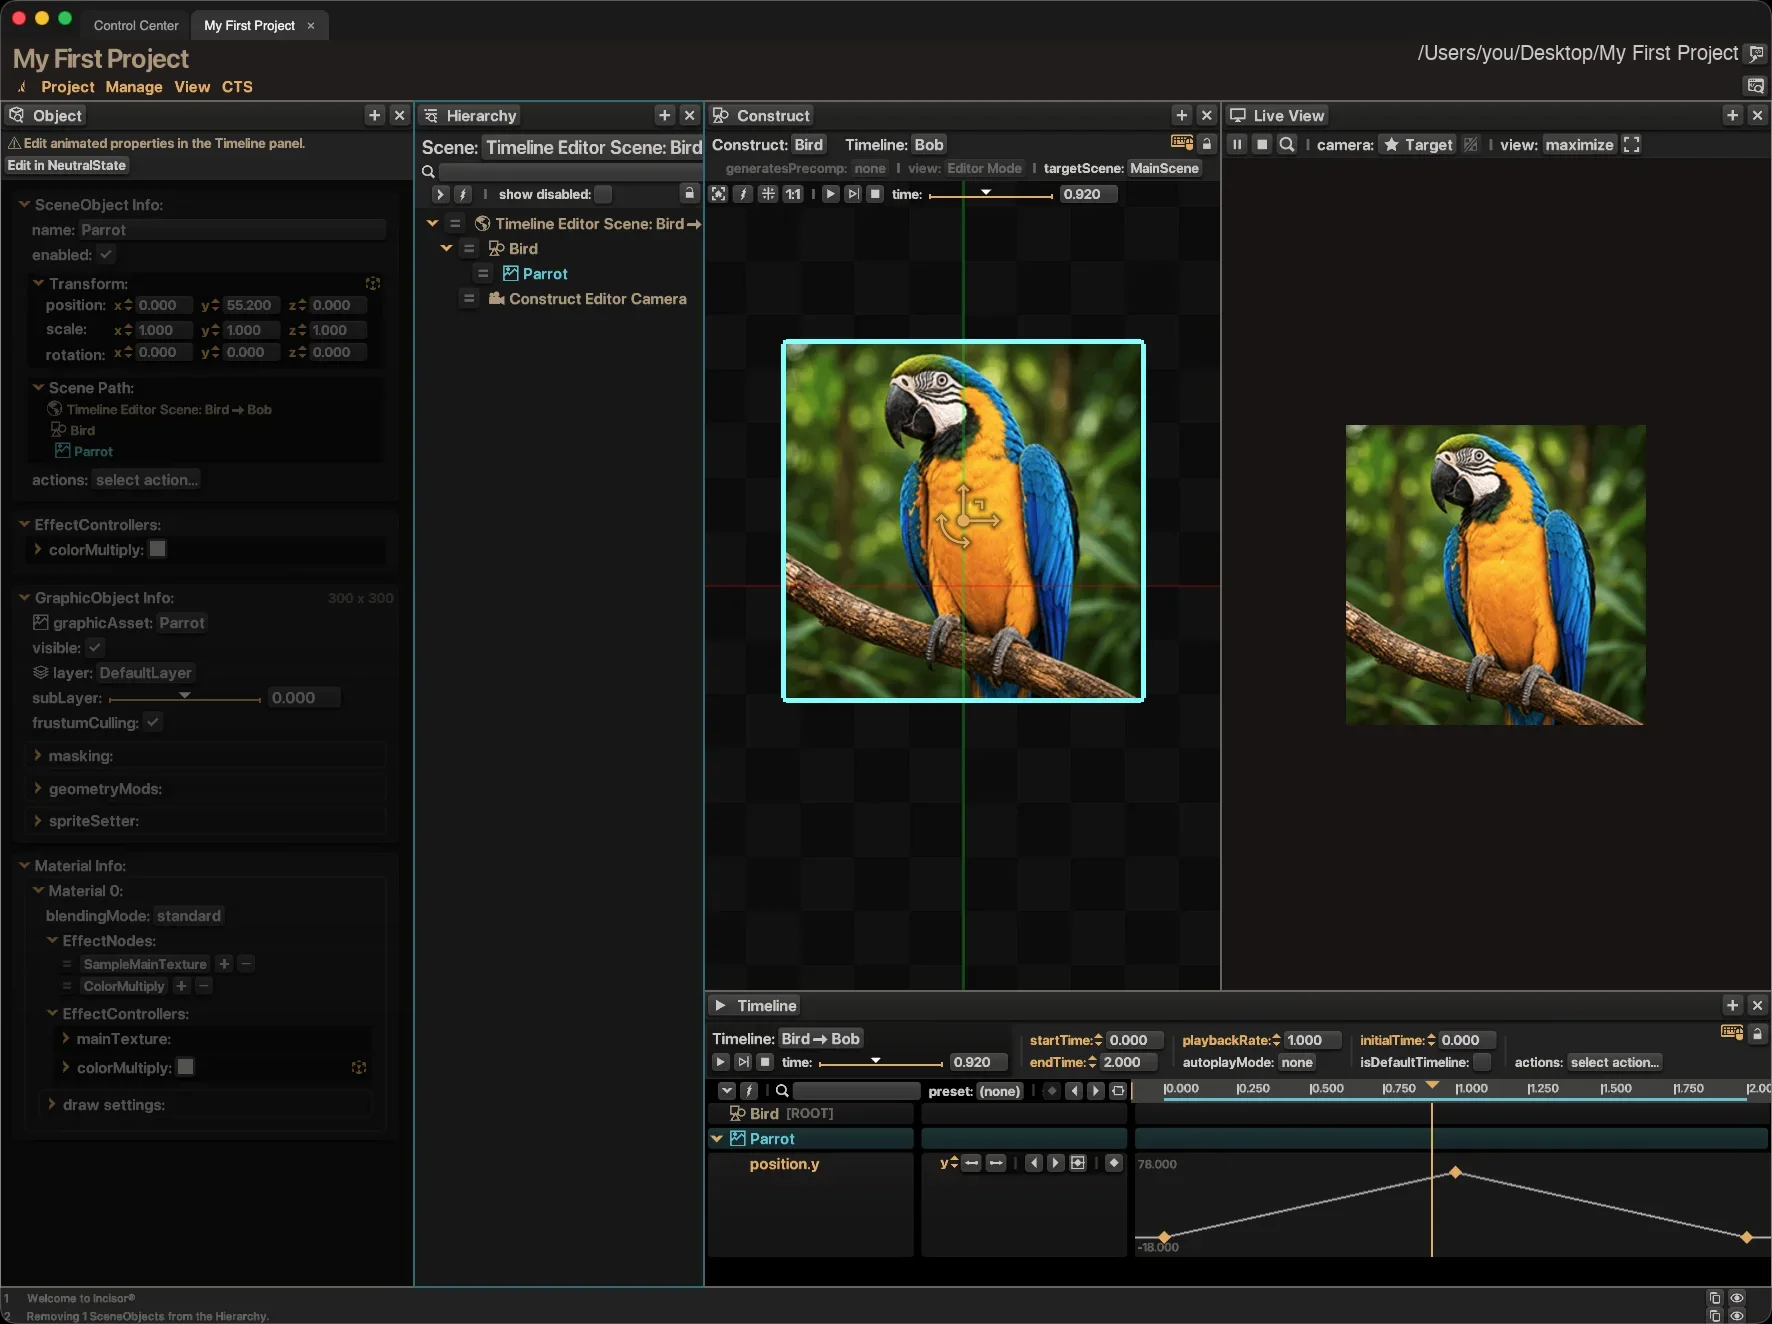
A Construct is a group of objects you build in the editor and save with the project. Each Construct can carry Timelines, keyframe animations you edit in the Timeline panel. Code then populates the Construct by name and plays its timelines. Here is the shortest possible tour.
- Add a panel with the + in any panel header and set its type to Construct. Add another and set it to Timeline.
- In the Construct panel's Construct menu choose New Construct… and name it
Bird. - In the Assets panel, find
SampleAssets/Parrot.pngand drag it into the Construct panel. The parrot appears in the construct's own view and in the Hierarchy. - In the Timeline menu choose Add Timeline… and name it
Bob. Timelines end at 1 second by default, so set its end time to 2 seconds. - Right-click the parrot in the Hierarchy, choose Animate Graphic Object, then position. Add a keyframe at 0 with y = 0, move the playhead to 1 second, add a keyframe with y = 60, then one at 2 seconds back at 0.
- Press play in the Timeline panel. The parrot bobs. Drag a keyframe or bend a curve handle and watch it change.
To put it in the game, two lines in init():
this.bird = nc.constructDefs.Bird.add(nc.mainScene, "Bird");
this.bird.timelines.Bob.play();
Constructs are how artists and animators put finished work into an Incisor® game. The FlowControllers & FlowStates tutorial shows how a whole game sequences them.
10 · Publish
Publishing turns the project into a folder of static files that any web server can host. A new project comes with one publishing configuration, DevMode, and more can be added in Project → Settings.
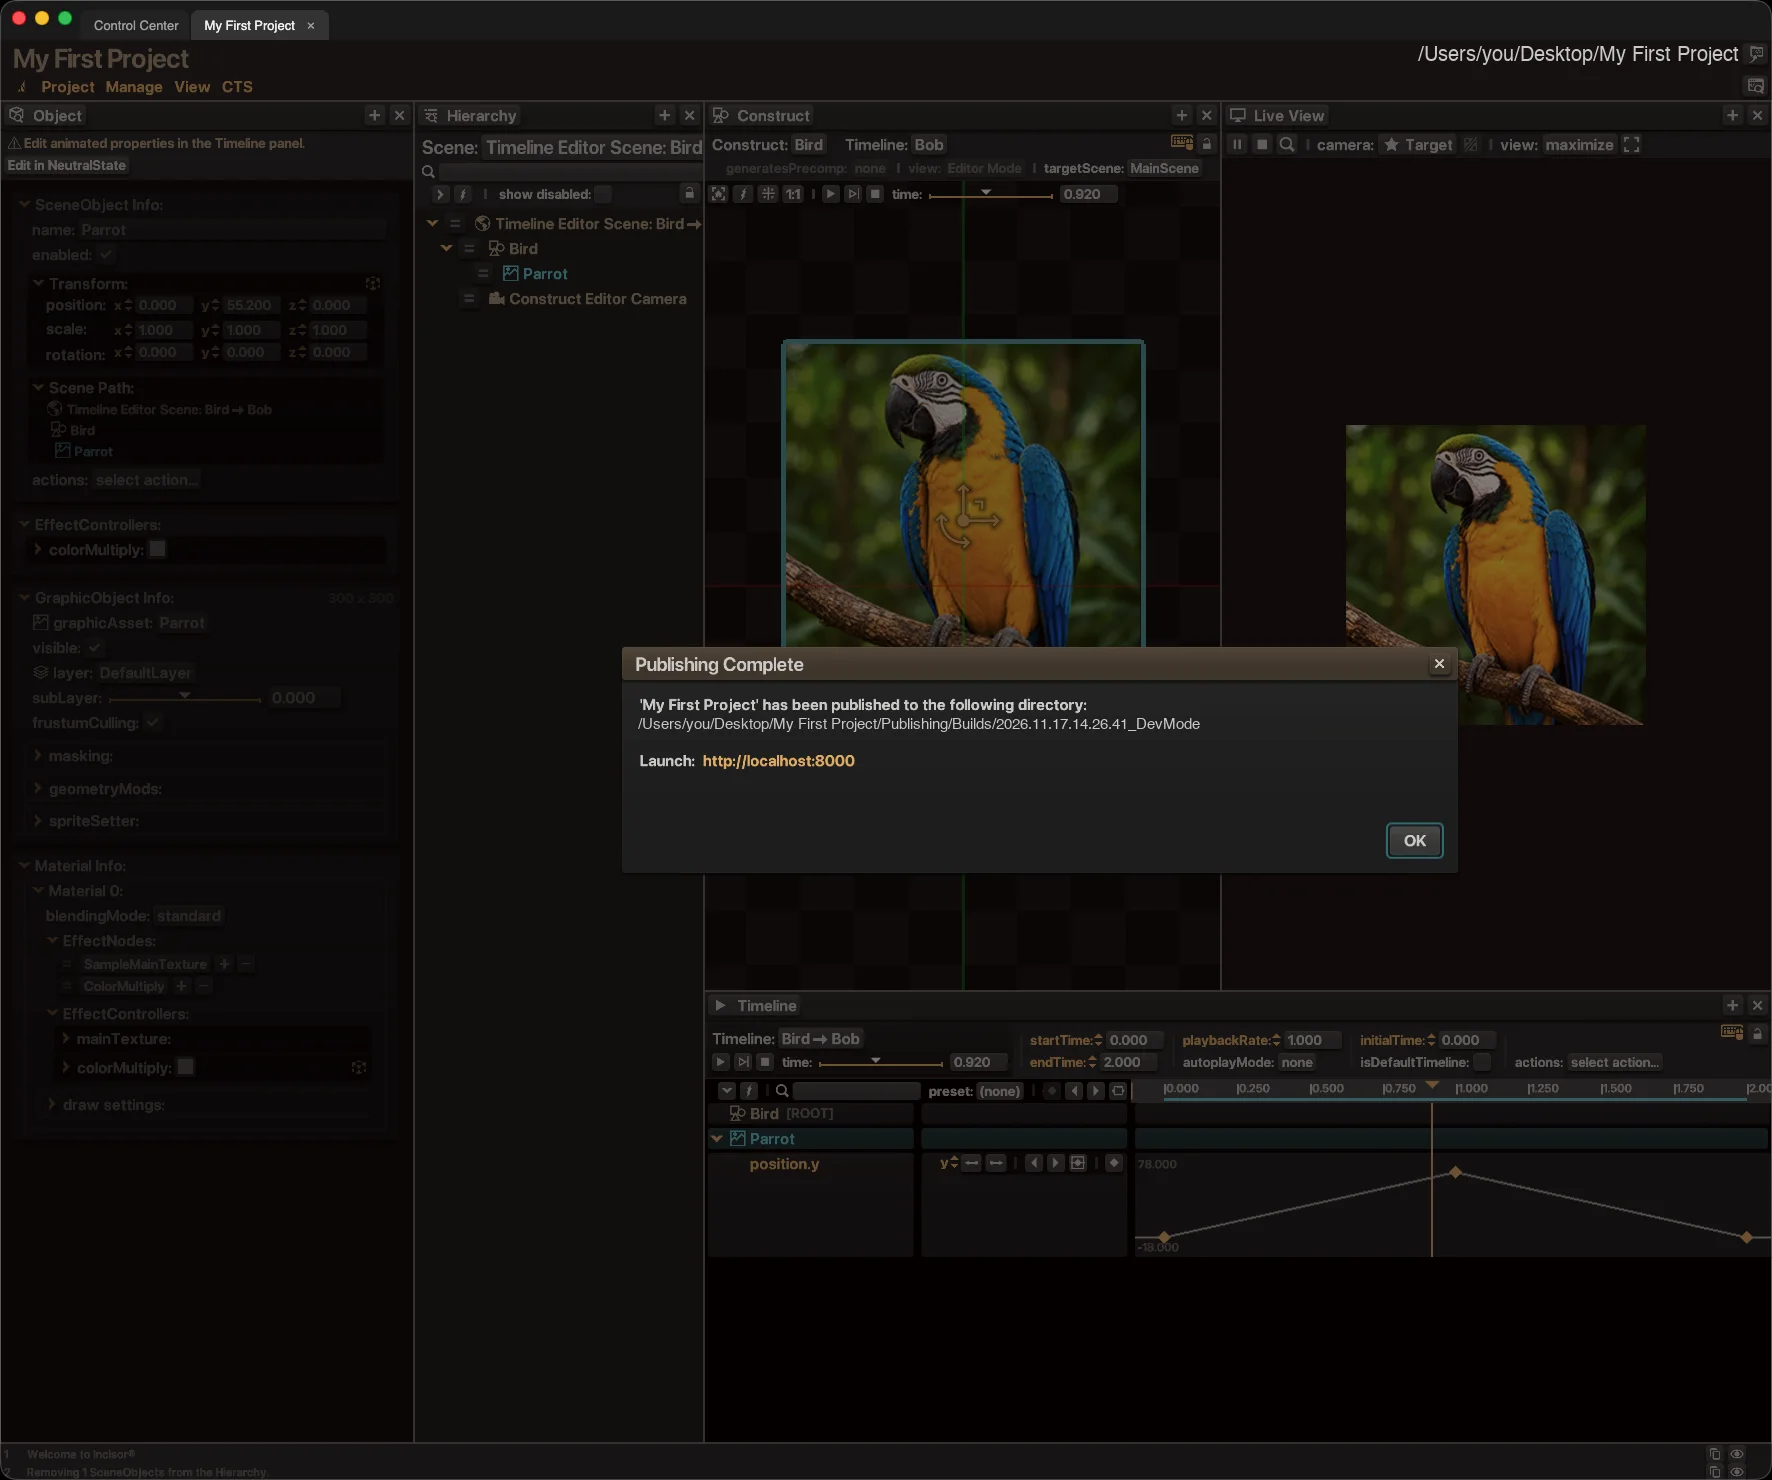
- Choose Project → Publish… and pick DevMode.
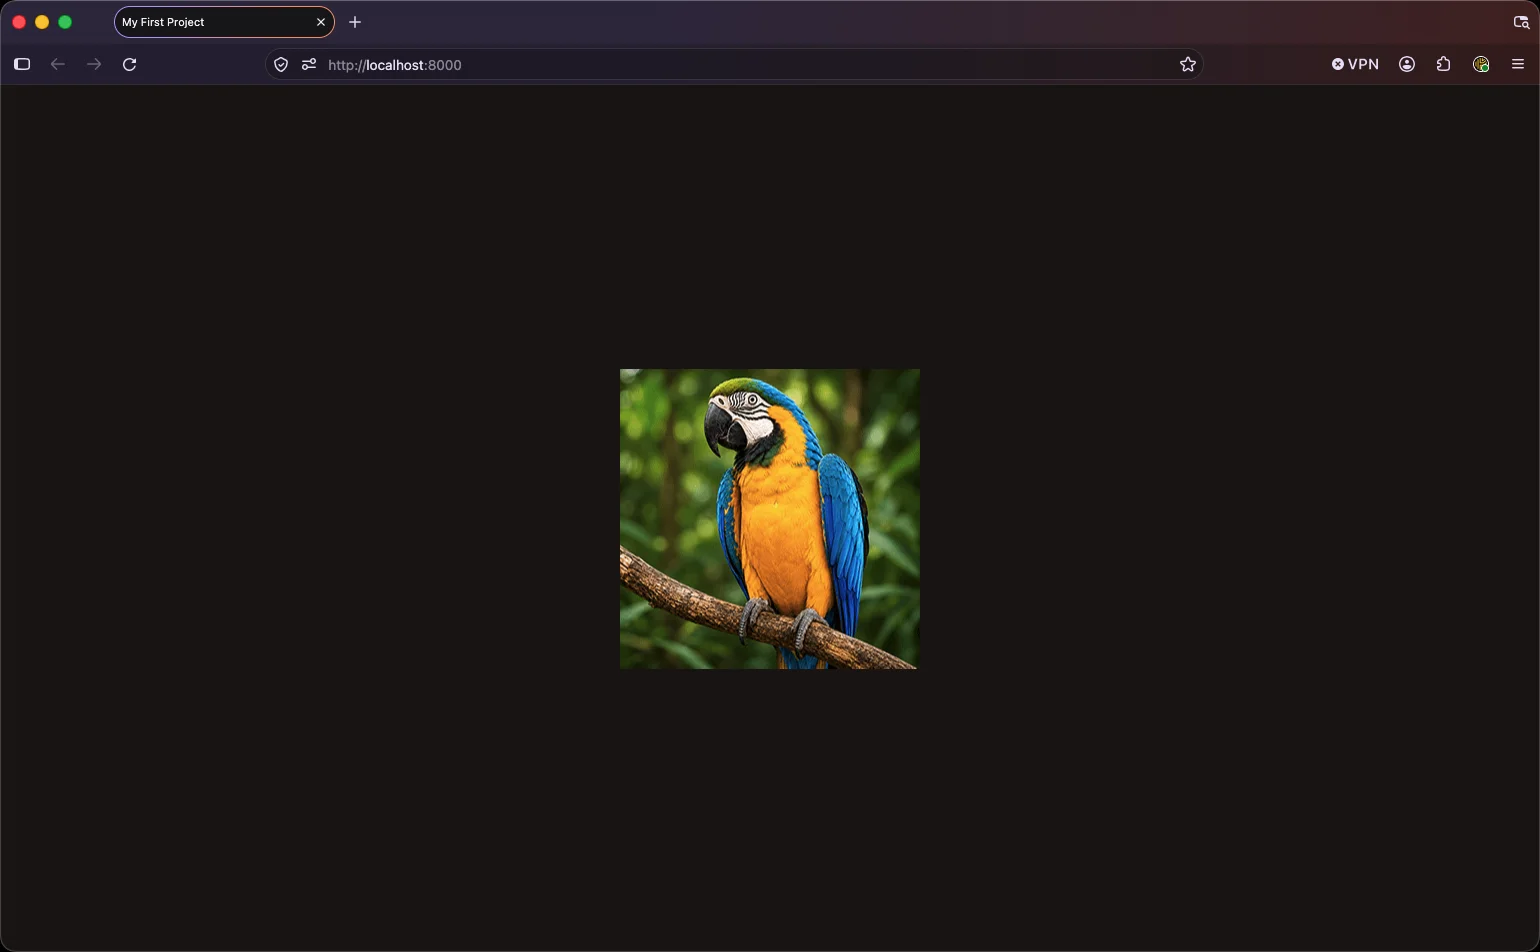
- When the Publishing Complete popup appears, click the Launch link. Your project opens in the browser, served from your machine.
Back in the project folder there is now a Publishing/Builds directory with a timestamped build inside it, and inside that a folder named after the project holding index.html, the compiled code and the assets. Upload that folder anywhere and the project runs there. Desktop apps for Mac and Windows come from the same menu once a desktop publishing package is enabled in Project Settings.
11 · When something goes wrong
You will mistype something. Here is what that looks like and what to do about it.
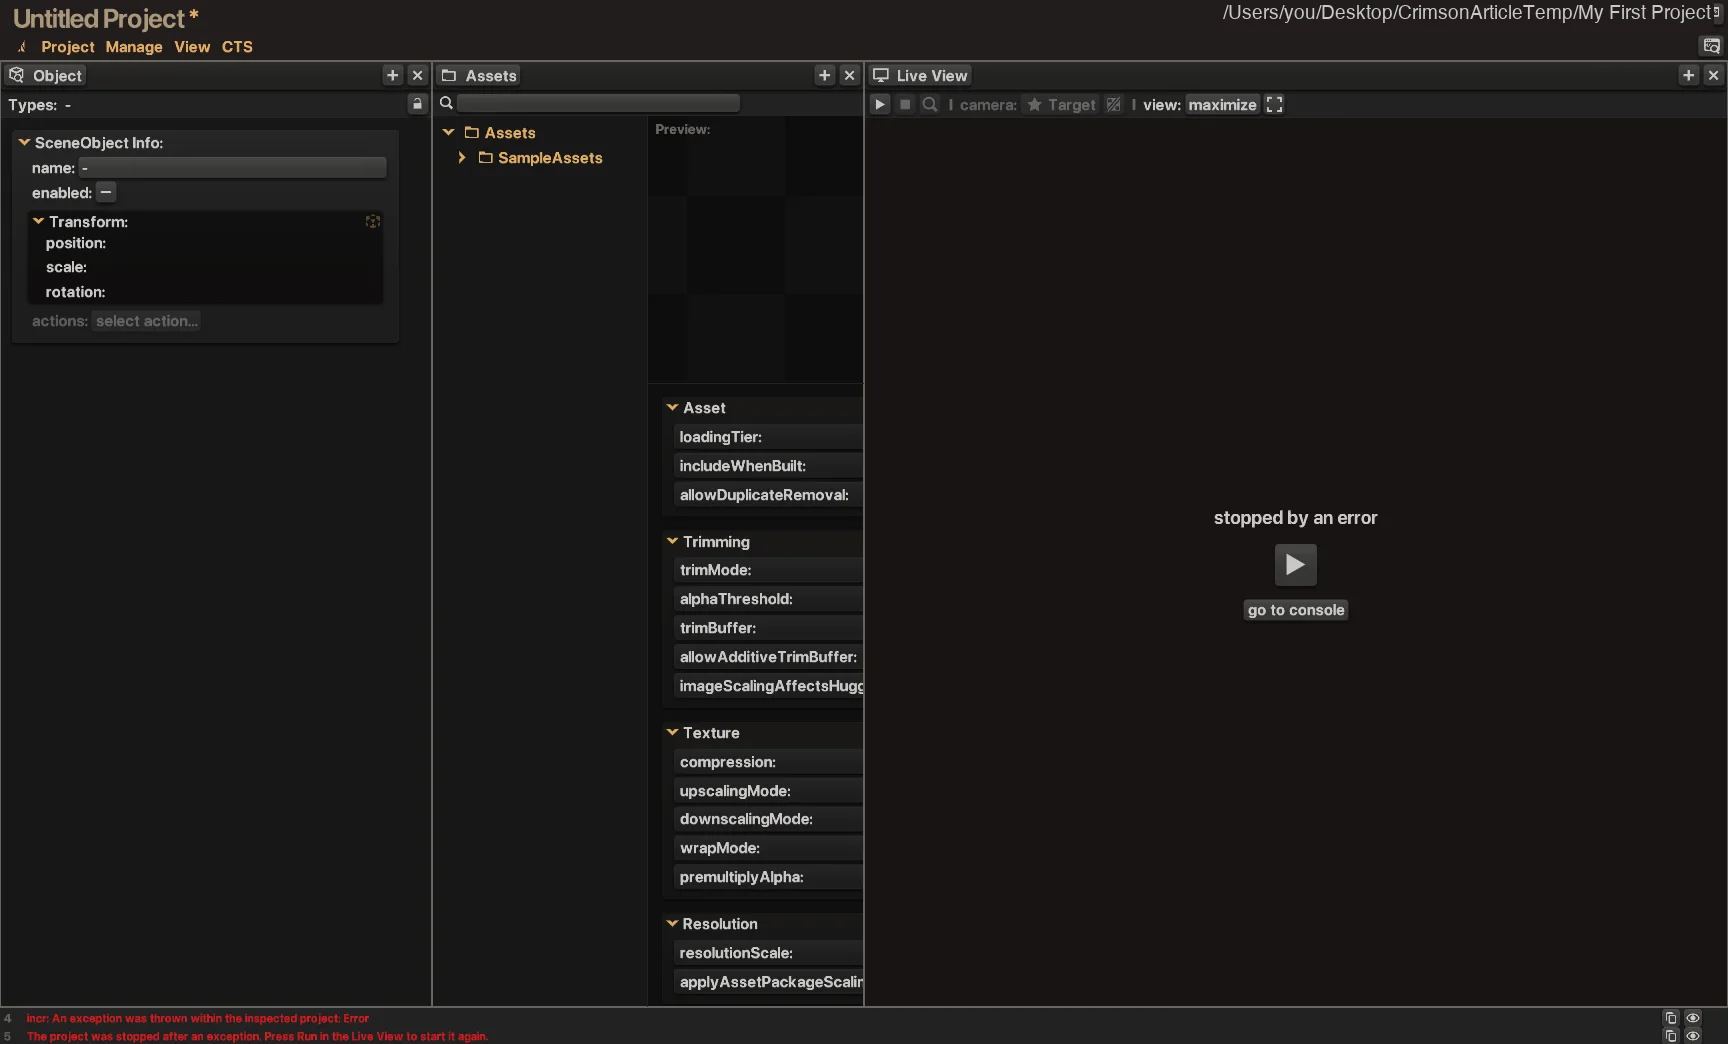
- Red lines in the log. When your code throws, the project stops, the log strip at the bottom of the window says so in red, and the Live View offers go to console. The console lists the error with the file and line in your original source, not in some generated bundle. Fix the typo, save, and the project reloads.
- The project won't start. Projects open paused on purpose, so an error in your code can't take the editor down with it. Read the log, fix the file, press Run again.
- Dev tools, right in the window. The dev tools button at the top right of the Incisor® window opens Chromium's developer tools for the running project: console, sources with your original files, breakpoints, network. You can debug in place without opening anything else.
- Stop is always there. The square button in the Live View toolbar stops the project without closing the tab or losing your panel layout.
- Breakpoints. Turn on editor debugging in Application Settings and VS Code can attach to the running project and stop on breakpoints in your own files. See Debugging from your code editor.
TypeScript. Type errors are reported before the project runs, in the log and in VS Code's Problems panel, so most mistakes never reach the Live View.
12 · Where to go next
The Template Library
Project → Import → From Template Library… opens a searchable library of ready-made code: buttons, text effects, lighting, shadows, counters and more. Each item has a description, an animated preview and example code that runs as pasted.
The API documentation
Open it from the Incisor® menu at the top left of any project tab, or from the Control Center. It is also what powers autocomplete, so the two always agree.
Your AI assistant
Point Claude, ChatGPT or any MCP-capable assistant at https://mcp.incisordev.com/mcp and it can look things up in the Incisor® Knowledge Base while it helps you write code.
Read the demos
Every project in the Gallery is meant to be opened and read. Total Destruction is a good first one; the Slot Template is the one to study for data, reels and flows.
Keep going
- Making a 2D Runner: a series of one-minute videos that builds a game from a blank project.
- Text and Fonts: everything about putting words on screen.
- FlowControllers & FlowStates: how a game moves from screen to screen.
- Optimization Checklist and Lazy Loading: when the project grows.
- Controlling Incisor® from the command line and having AI test your project: when you want to automate.
- What's New in Incisor® Crimson: a tour of the current release.